Category: DIY

Beverage Trailer Renovation

Beverage Trailer Renovation

I’m bad at going in order with my photos, but I’ll try my best. I usually don’t sit down to post until the job is already completed, oh well.

We started with a tiny $200 enlisted trailer that want even 5 ft tall inside. After several bumps on the head a asked my husband if the roof could be raised and well………

The original beast

I originally intended to use this trailer at vendor and market events formy essential oil business. Like I said you couldn’t stand up in the thing, we kept bumping our heads putting things in and out of it. As you can see in the pictures there were bolted rivets right in the middle and all the way around. I started removing them……..

Bolts removed and we took off the top half.

Then I started thinking this could be something…………….I envisioned an ice cold beverage trailer. My idea came after I saw an add for the Pour Horse Bar. You can see it at www.thepourhorse.com and it’s kind of like this..

I put that in there so you can see where my idea is going. I’m not going to do coffee, I just see a cold beverage unit. Galvanized tubs filled with ice to hold your own beverages, soda, beer, wine, even kegs. Whatever you want to Pitt in it for your guests is your business, we just provide the ice!

Birthday, reunion, bachelorette party, family gathering, the event ideas are unlimited. So how am I going to put this together? My husband’s a welder by trade so 4 steel posts and let’s raise the roof!

Then I had a pair of 100 year old doors I got very cheap. They used to be in the Karnes County Courthouse. They had several cigars of paint on them that needed to be removed first. We needed to make sure they would fit first. My husband had an old piece of piano hinge, so here we go.

Perfect fit, just needed to take about 4 inches off the bottom.

Now to take them off and get rid of lots of paint. I wanted them stained. Boy, that was days and days of stripping and sanding.

Chemical process of paint removal.
Sanding
They turned out quite well, stained and coated with outdoor poly.

I found an old Ford door on facebook and it was a rusty old thing. A bit of rusty removal and paint. It fit perfectly!

Primed for paint

I decided we might have a need for electrical plugs. Maybe for lights or a margarita machine or two!

My husband is good at painting and well, he has all the stuff to do it and we had white paint.

I had an idea for a roof, a little rustic, rusty metal and wood, and an a-frame style.

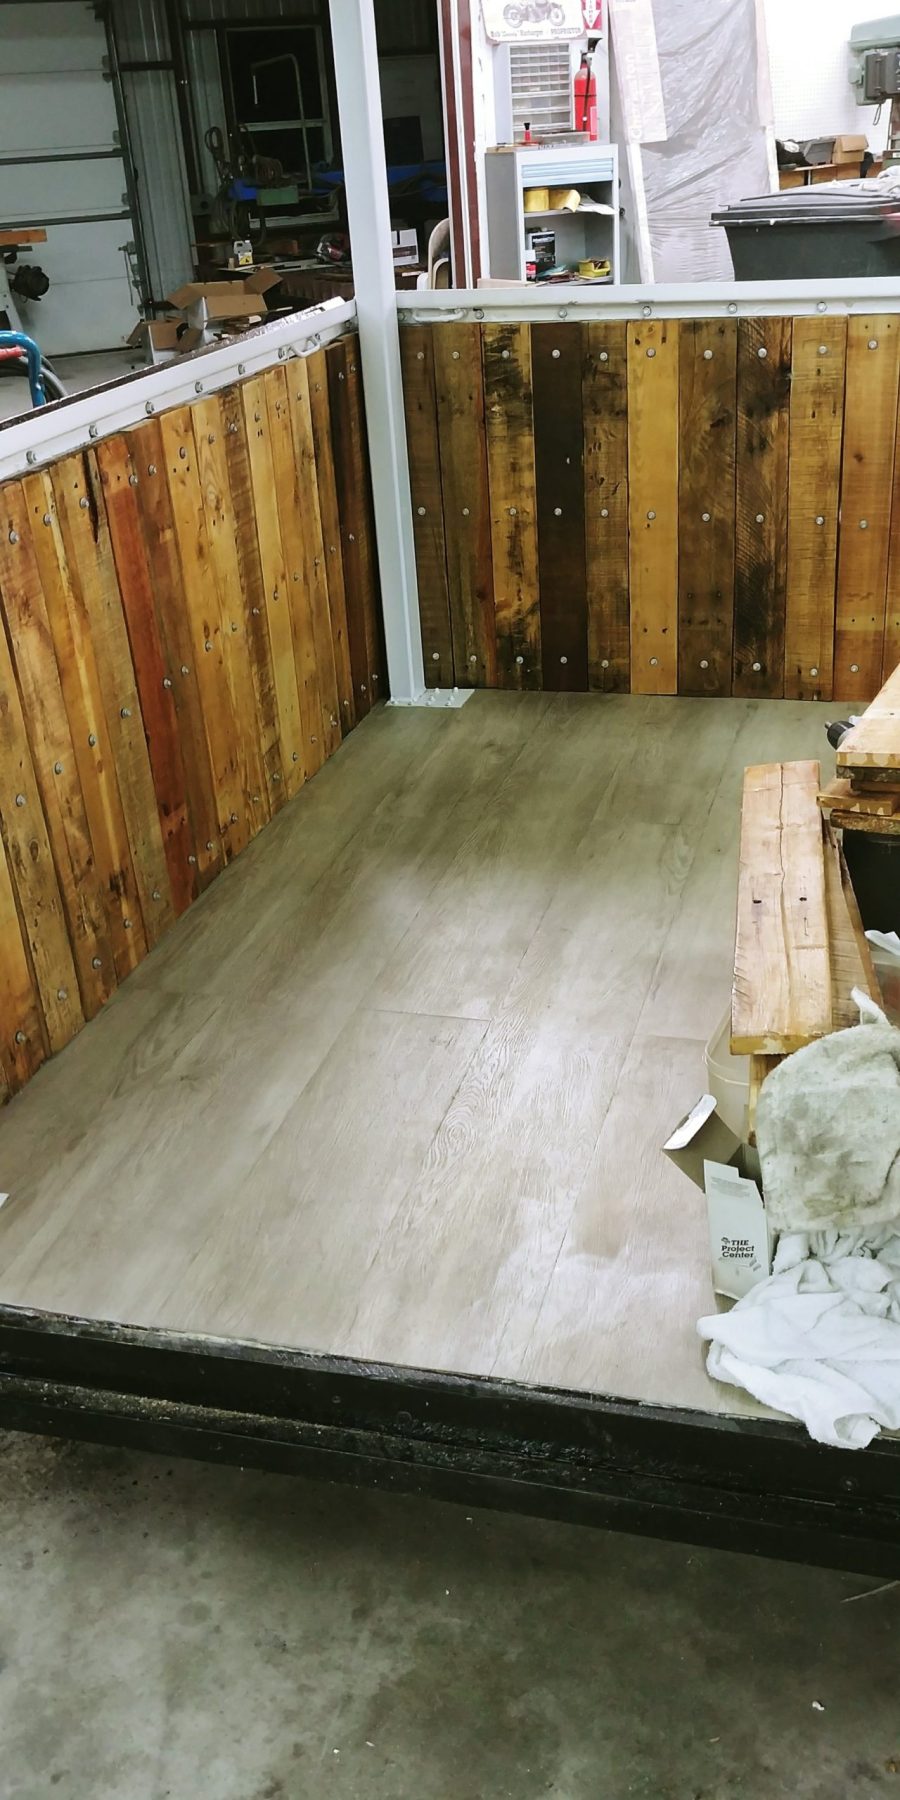
Then it was time to put the roof on. Went smoothly, we had to add a bit of trim and a soffit to finish out off. Then on to complete the inside with a floor I got for free and wood siding I got for free as well. Most of the wood forThis project was free from some pallets I took apart so I can’t complain. The floor was from a lady renovating her bedroom and she have me her oldstuff. It was nice, really heavy duty vinyl wood look planks.

Chinese Noodle Soup with Sliced Leeks

Chinese Noodle Soup with Sliced Leeks

Chinese Noodle Soup

INGREDIENTS

6 cups broth, can be beef, chicken or vegetable

2 – 3 servings dried Chinese egg noodles

2  eggs

1/4 medium onion, chopped

1 leek stalk

4 cloves garlic

thumb size ginger piece

1/2 cup chopped cooked beef, shrimp or chicken if desired

salt and pepper to taste

DIRECTIONS

To prepare broth wrap ginger and garlic in cheese cloth and drop into pot, add sliced onion and salt and pepper to taste.  Bring to a boil, then simmer while you prepare the rest of the ingredients.

Boil water and prepare chinese noodles as per instructions, drain and set aside. Boil two eggs, peel and slice in half, chop meat if desired, set aside. Take the leek stalk and cut off the leafy top, cut into thin strips lengthwise, set aside. Take the larger bottom section of the leek and slice at an angle, place immediately into simmering soup and remove cheese cloth containing ginger and garlic, you can toss it now.

Place noodles in bowl, add meat if desired and half an egg, ladle hot broth over the bowl, sprinkle a few of the leek strips over the top.  Salt and pepper to taste.  This is an easy and quick recipe.  You can used left over meat from a previous meal to add in, I don’t like wasting food.  this is something I might make after I’ve cooked a chicken or had steak the night before and just couldn’t eat it all.  Or you know that time you cook almost all the shrimp however, there are a few left in the freezer?  Grab them and throw them in delicious soup.

Fireplace starters??

GREAT FIRE BATMAN!!!!!!

For those of you who truly know me I am very frugal, I reuse and recycle to the best of my ability.  I am always looking for new ways to use things I keep.  I tend to not throw many things away, he, it could be useful one day.


For those of you who are in Young Living can I ask you a question???  What do you do with your cardboard tubes that the bottles are packed in??  I’m going to show you a handy useful tip right here and all you need is a fireplace, cardboard tubes and used office paper, newspaper or any recycled unwanted paper.  


I happen to save the paper from our printer when we oops, print too many copies, or just plain mistake sheets.  Yes, I pile them up all throughout the year waiting for the cold weather to arrive. I am going to show you how to use the paper with your cardboard tubes to make fire/starter or kindling some may call it.  I actually use the word fire starters because to me kindling is wood.


So here is what I do.  First of all I take some of the unwanted paper and squish it up, pretty tight and in a long fashion like this:

 The reason being is so that I can easily stuff the twisted paper into the tubes, I use 2 or 3 of them and push it into the tube pretty tightly, leaving a bit sticking out on each end so they are easy to light.


Like shown here          

I think by now you may be beginning to see what I am up to!  Yep, I do loads of these and it takes just a few short minutes a day to get 50 – 60 of them ready.

I have a box beside my fireplace so we can easily grab a few when we need to light a fire.                                                                                         


It’s simple and easy to place a few under the grate of wood, light the ends and there ya go!  Very I easy and useful I would say.  None of those chemically made fire starters they sell at the home improvement stores, no harsh fumes and best of all FREE!!

Here’s a picture of them beginning to start up my nice glowing fire this evening.  They do an excellent job I might add!


Beef Bone Broth

BEEF Bone Broth

Isn’t this lovely!!  Look at the color, nice and golden.  A lot of people call it “Liquid Gold”.  Why you might ask?  Well, it is very healthy not to mention delicious!!  Whether it is beef or poultry stock, consuming a warm cup of home made bone broth can be beneficial to our skin, bones and overall wellness.  There are a lot of great things in there like collagen for instance, that is great for healthy skin.

And the great thing about home made is that you can begin with organic grass fed beef or free range poultry and get an even healthier broth for your family without any added chemicals and salt, yuck!

To begin with may I suggest a nice roast like my BEST Prime Rib and save the bones.  I use a 6 qt instant, electric pressure pot.  You can buy these on AMAZON, they are great time saving gadgets that are a must for any cooks kitchen.  I will blog more on that later, but it is one of my favorite things!

I add 4-6 cups water to my instant pot, place the bones in there, cover, lock and cook for 90 minutes.  Look!!  Is that not beautiful or what??  Now you can heat a cup each morning and enjoy, add noodles, some veggies, use it for soups, gravy or even mix in with your mashed potatoes or rice dishes for an added flavor.

A nice golden broth, ready to be filtered and poured into containers.  I use a very fine meshed strainer to catch any particles that may be in the stock, which won’t hurt, it only makes it look ugly.

Some people may as an option add seasonings to the broth if you know you are going to use it for a specific thing, like Italian seasoning for instance.  I personally don’t because I want the option to be able to use it for whatever I want and season it later.

BEST ROASTED PRIME RIB

BEST ROASTED PRIME RIB

BEST Prime Rib Roast EVER!!

This is something I cook around the end of the year for our friends and family.  I quit doing the decorating and gift giving years ago due to the whole commercialism and selfishness the whole thing represents and relieved my immediate friends and family of the burden of gift giving.  At least under my roof!  No, you won’t find a Christmas tree in my house and YES!  I still believe in Jesus, just not in the celebratory way the world has pressured us to do.

Instead I prefer spending time with friends and family, spending my money on food and a huge gathering that will still be in the minds of those who attend for many years to come. Friendship and time with my family is priceless.

My prime rib method is one I do not quite remember coming across, or even overhearing, but all I know is that I saw or heard it somewhere and it works great for me.  My guests will attest to the fact, they come year after year for more!

Here’s is what I do:

Bone In Prime Rib Roast(allow 1/2 lb per person and it will be more than you need, but enough for a bit of leftovers)  Now I purchase my prime rib roast about a week before I plan to cook it, I like my meat aged.  I place it in the refrigerator and cook it within 5-7 days.  I also remove it from the refrigerator in the morning because I prefer to begin with a roast that is at room temperature.

Pre-heat the oven now to 500 degrees Fahrenheit

DRY RUB – Garlic powder, lemon pepper, Italian seasoning, parsley, onion powder, Lowery’s Seasoning Salt, Mrs. Dash Seasoning and rock salt.  I take approx. 1 Tbl-2 Tbl (depending on size of roast) of each and put them into a small jar or container with a lid so I can shake it up and mix it well.  I take this and rub it all over the sides of the roast, I really rub it in well.

I happen to love cast iron pans, I cook the roast in a large cast iron pan and then I can use the drippings for a gravy or au jus when I remove the roast, YUM!  I rub the pan with butter or coconut oil, lots and lots, go ahead, it’s good for you!  Place the Roast bone side down into the pan.  Don’t worry about covering it.  I do place a meat thermometer in it just for my piece of mind, but, I never go by it, because once yu put the roast in the oven you DO NOT OPEN the door, not even once.

By now your roast should be ready to place in the oven and it should have reached it’s 500 degrees.  If not, wait until it comes to full temperature.  Place the pan and roast into the oven, close the door and set a timer for 1 hour for a 2-3 bone roast and 1 hour 15 minutes for a 4 bone or larger roast .  Trust me 1 hour to 1 hour 15 minutes is all it takes for the first part.

Once the timer rings you may turn off your oven, BUT, DON’T OPEN the oven, DON’T.  Now reset your timer for 2 hours, yes 2 hours!  Now you may want to prepare the rest of your meal.  When your timer goes off you can open the oven and remove your pan and roast.  This is when I check my meat thermometer and it usually is right on rare or med rare depending on the size.  A larger roast will be rare, a smaller usually med rare to med.  You will have the ends for those who want their meat more well to well done and the center will be a nice med rare to rare, trust me.  Remove the roast to a nice platter and use the roasting pan to make au jus or a gravy if desired.


This was after we ate and a small piece of one end was all that was left.  It was delicious as usual.

Want great hair?

Want great hair?

Want great hair?

Try this DIY hair mask using essential oils.FB_IMG_1472244088293

I just love coconut oil and all its benefits. Using in my hair is just one of the many ways I use it.

Remember if you need to stock up on oils, or maybe you haven’t started using them yet contact me right away. I can start you out with a wholesale membership that saves 24% everyday. Plus, we have a great rewards program that allows you to get free product monthly, loyalty gifts and special rewards program only perks.

Check it out here:

Www.thingsthatwarmtheheart.com

Wonderful Sweet & Calm Blend

Wonderful Sweet & Calm Blend

usedFB_IMG_1460817588454

I just can’t say enough about this wonderful blend.  Whether it’s bath time, bed time, or smack dab in the middle of the day and things are getting rough and you need some calming atmosphere.

If you need some calming emotional support try this in a diffuser.  Don’t have one?  Place the drops on a cotton ball or a cork top and set it nearby, it can even be taken into the car, into the office, or to school.

Don’t have your oils yet? Click Here, I’d love you to join me and my team as we endeavor on our oily journeys together daily.  Young Living essential oils offer great emotional support and overall wellness support.  Read more by checking out my essential oil page by selecting Essential Oils from the top menu.

A better way to vacuum?

FB_IMG_1453950310453Who would have thought??  Want your vacuuming experience to be a bit more enjoyable?  Why not place a cotton ball with a drop or two of your favorite essential oil right into your vacuum bag!  If you’ve already replaced the bag and maybe it old and partially used, refresh it by sucking up a cotton ball right into the vacuum with a drop of Purification to kill odors and clear the air, Thieves when you’ve got a sick person in the house, or Eucalyptus in the winter months when you need a bit of support for your respiratory system.  The possibilities are truly endless! YOUR WELCOME.   Safe and toxic free.  If you don’t know already I only use and recommend Young Living essential oils in my home and for my family.  Ready to get started with essential oils?? CLICK HERE

DIY Mayo

DIY Mayo

Mayo

Ingredients
  • 1 large egg
  • half a medium lemon, juiced (approximately 1 Tablespoon)
  • ½ teaspoon dijon mustard
  • ¾ teaspoon kosher salt
  • ¼ teaspoon ground white pepper
  • 1 cup light olive oil

Directions

  1. Begin by placing all ingredients in a wide mouth mason jar of other tall, cylinder shaped container. I generally use the one that came with my immersion blender.Make sure the white pepper is not clumped up and let the ingredients sit for a minute or two until the oil rises to the top.
  2. Place the immersion blender in so that it sits firmly on the bottom of the container. Set it to the highest speed and turn on. Do NOT pull the blender up or out, just allow it to sit at the bottom of the container. The mayo will emulsify and begin creeping up the sides.
  3. Once most of the mixture has emulsified and looks like mayo (less than a minute!), you can begin to move the immersion blender up and down to incorporate any oil that is sitting on the top.
  4. Place in a container with a lid, keep refrigerated and use up within one week.
  5. I often add a twist to the mayo if I am making something special like these suggestions:
    1. add some Jalapenos if you want some spicy burgers
    2. add garlic and italian seasoning and put n bread for the oven
    3. add Tapitio sauce to taste and what a kicker!
    4. add whatever you want, experiment, play with it!

DIY Shampoo

DIY Shampoo


This non toxic all natural 4 ingredients shampoo is great!  My hair is so soft and shiny after using it for over 3 months.

Ingredients:

4 oz. distilled Water

4 oz. Aloe Vera Gel (I get mine here without Vitamin E) or this one, which is a bit cheaper but, contains Vitamin E.

2 oz.   Dr. Bronner’s Baby Mild Unscented Castille Soap (I get mine here)

5 drops each of Rosemary, Lavender and Cedarwood essential oils(I get mine here)  if you have flaky dry scalp, add 5 drops Tea Tree oil, for a moisturizing fuller body shampoo add a tablespoon of avocado oil to the aloe gel and shake to mix BEFORE ADDING REMAINING ingredients.  You may need to shake gently before each use if oil separates.

Watch this video for instructions on how to mix.